|
| New Windows on Front Elevation |
 | | |
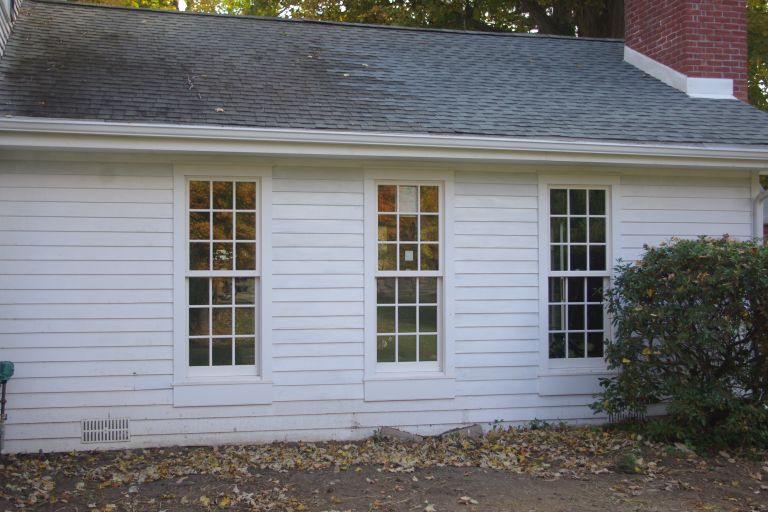
| New Tall Windows on Back Elevation |
This is the same house the "Modern, Open Plan Updates Historic Home" blog post is about.
(click here to read it)
This Historic Federal-style Colonial had been flanked in the 1970s by a two-car garage at one end and a large family room with open-truss ceiling on the other. Of course these spaces added to the modern usefulness for any folks living there but these additions, while sort of symmetrical in their massing at least, were not sympathetic to the historic nature of the existing home. The windows were small and high in the back, with a large bow window in the front. The family room had a very dated style and the open trusses were designed with a heavy bottom chord that, due to the step down from the main floor level, was low enough to feel like you might hit your head as you left the kitchen and just made the room feel oppressively low for such a large space.
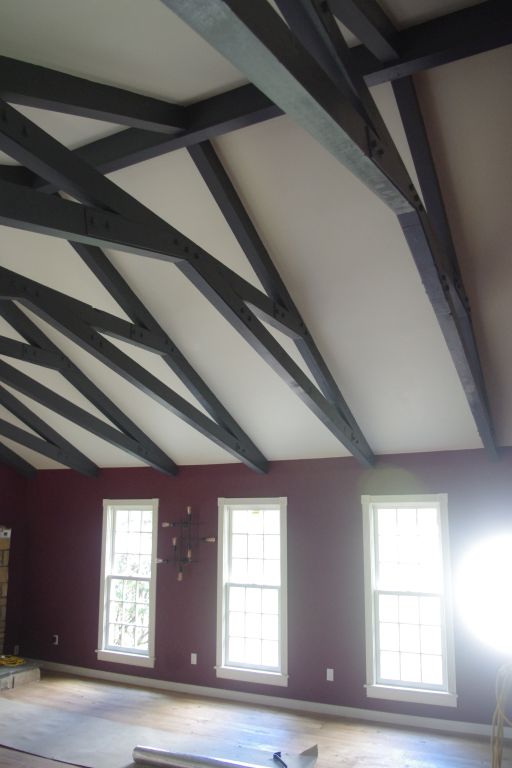
 |
| Renovated Family Room |
The pluses were that this family room was large area-wise, with glass on three sides, and connected to the deck and pool with a sliding glass door at one end and the kitchen on the other end. We changed the front and back windows to let in more light, allow views of the beautiful property due to their lower sill height, and have more historically accurate proportions/placement on the wall.
We re-configured the truss to raise the height of the space below the structure and make the room feel larger, higher, and more contemporary. We removed the horizontal band of chair-rail/wainscot that further divided the walls and accentuated the long/low feeling of the room as well as the horizontal heavy beam along the top of the walls. We added new mechanical systems for heat and A/C, allowing the inefficient, dented baseboard radiators to be removed. In addition a new efficient (red!) wood stove insert was installed, bold paint color covered the walls, and engineered wood flooring replaced the water-damaged particle board.
 |
| Renovated Family Room- 3 Windows replace Bow Unit |
Now the room is a family friendly, sunny, and comfortable lounging space with a vaulted/high open truss ceiling. It is accessed off the kitchen and the office by just a few steps. The space in the main section of the house that was a living room was taken over to be a mud room by the entry/garage and a larger dining room. (read previous post to see more on that). Once the clients decided they didn't need or want a separate formal living room and family room, they were freed up to explore what became the solutions you see here and this room is so large, that it can be arranged into activity zones and meet many needs/purposes for the family.
 |
| Family Room- Looking toward Kitchen/Main House |
Ultimately the new residents are doing the latest update to a rural colonial that has housed many families for over the past century by being added to and modified throughout the decades. This most modern iteration is vibrant and classy without being too tied to history. It allows for all aspects of the family activities- from mud boots and backpack storage, to working from home and homework project space, to hosting dinner parties, to relaxing with a movie or a fire or even a game of billiards. (notice the pool table stayed!) Like we tend to do in current designs, rooms were opened up to each other, lots of light was invited into the space, and storage space was given more of a priority. In addition, poor circulation layout was re-designed -as in the garage door moving out of the dining room and into a new mud room area by the front door- and the powder room access being changed so that flow was better connecting the family room to the rest of the house. Lastly, updated finishes and mechanical systems changed the look and, literally, the feel (temperature) of the space.
 |
| Before - Front of Home w/ Garage and Family Room Wings on each side |
 |
| Before- Back Elevation of Family Room Section |
 |
| Before - back half of room was dark with small, high windows and wood paneling |
 |
| Before- Heavy Bottom Chord of Trusses effectively lowered the ceiling height |